
— Blogs —
—Products—
 Consumer hotline +8618073152920
 WhatsApp:+8615367865107
Address:Room 102, District D, Houhu Industrial Park, Yuelu District, Changsha City, Hunan Province, China
Product knowledge
Time:2022-05-18 20:34:00 Popularity:764
Installation and precautions of soil moisture speed tester
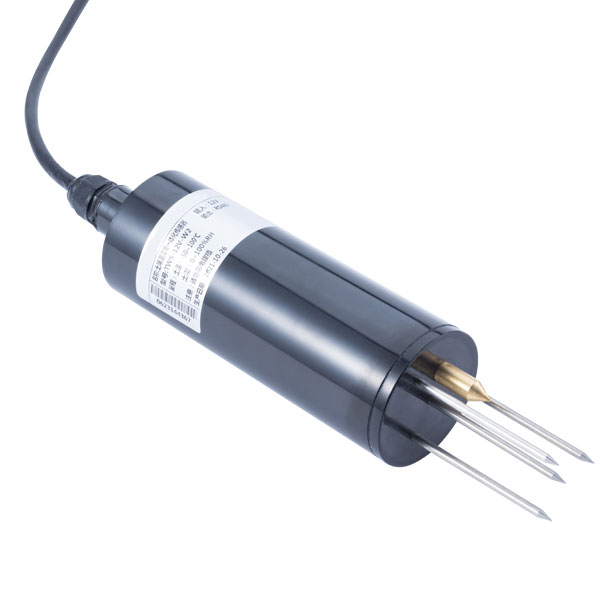
The soil moisture meter is a product developed by NiuBoL, also known as non-contact soil moisture meter and soil moisture meter. It is a sensor based on the principle of dielectric constant. It can dynamically observe the soil moisture content of different soil layers, and conduct fast, accurate and comprehensive observations, allowing people to achieve a high degree of soil perception. The following NiuBoL manufacturers introduce the installation and precautions of the soil moisture speed tester:
1. Installation
1. Preparation
1) Unpacking inspection
Check whether the outer packaging is damaged; check whether the equipment and accessories are complete according to the equipment list.
Note: The soil drill is not included in the factory accessories of the moisture meter, if you need it, you can purchase it additionally.
2) Tool preparation
Earth drill, purified or tap water, water basin, gloves (according to individual needs).
2. Instructions for installation location selection (applicable to farmland crops)
1) Install the equipment after the crops are sown;
2) The installation location is flat;
3) Under the condition of all-round irrigation, the area with less water is preferentially selected as the monitoring position; under the condition of partial irrigation, the humid area is selected as the monitoring position;
4) Select a position where the growth of crops is balanced and can represent the growth of most crops;
5) Know the root distribution of the monitored crops, and generally choose a location close to the water-absorbing roots of the crops.
Note: The installation site of the equipment should be selected at a relatively high terrain to prevent rainwater from pouring into the equipment and causing equipment short-circuits or line failures.
3. Punch holes
1) Drill bit, handle and support rod of the soil borrow drill. After completion, place the soil borrow drill vertically on the ground, hold the handle firmly with both hands and press down slowly and rotate it slowly. (Note: Don't use too much force, be sure to turn a few more turns at a slow speed to prevent the drill from deviating to the hole and making it crooked)
2) Take the soil drill out of the hole, put it in a pot, and use a tool to collect the drilled soil into the pot to use with mud. (Note: The first time drilling soil is not collected because there are too many impurities)
3) Repeat the above drilling and soil extraction, and try to put the sensor lightly into the hole during this process (do not push the device to the bottom) to test whether the depth of the hole is appropriate; if there is a stuck, then Use a soil drill to make corrections to ensure that the sensor can be put in and taken out smoothly; until the hole depth is flush with the installation position marked by the sensor, the drilling is completed.
4. Grouting installation
1) Slowly pour the mud into the hole, about 1/2 of the hole; it can be increased or decreased according to the actual situation.
2) Slowly put the sensor into the hole, slowly turn it in one direction and press it down. Too fast speed may cause the air bubbles not to be completely discharged. (Note: Do not pull up the sensor during the process of turning and pressing down again to prevent the gas from being sucked into the hole again).
3) When the sensor is installed to the correct depth, some mud will overflow around the device, and the grouting is completed; at this time, the sensor installation depth is flush with the hole. (Note: Remove excess mud beyond 3CM around the sensor to prevent caking from affecting water infiltration).
5. Install solar panels (users who do not need solar panels do not need to operate this step)
1) Solar panel site selection
The installation position of the solar panel should be as far away from the sensor as possible. Generally, it is more suitable to be 50cm away from the sensor, but it should not exceed the length of the power cord. The panel of the solar power supply panel should face the direction of the sun, that is, the south, and the front should be as unobstructed as possible.
Just insert the solar panel bracket in the selected position.
2) Fix the solar panel
Fix the panel of the solar panel to the bracket, align the four holes in the middle of the panel with the four holes on the bracket, and then use the screws to tighten.
3) Connect the solar panel and the measuring instrument
First, connect the panel and the terminals on the bracket together and screw them together;
Secondly, to connect the solar interface of the device, you need to pull out the top cover on the top of the device, and the solar interface (air jack) is on the opposite side of the switch key; insert the other end of the power cable of the bracket into the interface, and then tighten the bolts. Complete the solar panel installation.
6. Installation is complete
After pulling out the top cover of the device, press the switch key, the device can work normally. It is recommended to resume normal work after the mud returns to normal.
2. Matters needing attention:
1. Main points of sand installation
The sand installation is the same as the loam standard installation steps. It should be noted that a sufficient amount of water should be prepared, not less than 5L; until the water appears. Then follow the steps to slowly pour the mud into the hole, about 1/2 of the hole. The rest of the installation steps can refer to the installation of loam soil.
2. Clay installation points
The installation of the clay is done after drilling the holes to collect the soil, and after cleaning the impurities, soak the clay in water for more than 4 hours to soften the clay and make it easier to live into a relatively uniform slurry. After soaking, stir until it becomes thick and grouting. The rest of the installation steps can refer to the installation of loam soil.
Sensors & Weather Stations Catalog
Agriculture Sensors and Weather Stations Catalog-NiuBoL.pdf
Weather Stations Catalog-NiuBoL.pdf
Related recommendations
Related products
 Atmospheric Temperature Humidity Pr···
 Soil Temperature Moisture Sensor 4-···
 Air temperature, humidity and atmos···
Screenshot, WhatsApp to identify the QR code
WhatsApp number:+8615367865107
(Click on WhatsApp to copy and add friends)